The stock processor in the HP EX470 is the paltry 1.8GHz AMD Sempron 3400+ which is a Socket AM2 (940) (AMD part # SDD3400IAA3CN) which is fine for schlepping files between hard drives. But we want real power so in this article as will be upgrading to an 2.6GHz AMD LE-1640 Orleans (45W). Those of you with at least a fifth grade education may have noticed that 2.6GHz is substantially greater than 1.8GHz (sixth graders know that it's 45% greater), but the LE-1640 also increases the processor's L2 cache to 1MB (from 256KB in the Sempron).
Before we proceed, a little fine print.
Replacing the processor will most definitely void your warranty. Although this operation worked for me and my particular computer, I can not guarantee and will not be held liable if it does not work for you or causes damage to your computer. It's also not for the faint of heart. You alone are responsible for your actions.
That out of the way, lets begin.
What you'll need (or Get out your Credit Card)
The processor we will be using is the 2.6GHz AMD LE-1640 Orleans (45w) which can be ordered from Amazon.com for the bargain basement price of only $51 (click here to order).
 It appears as thought the LE-1640 had been discontinued on Newegg, but they now sell it again and for only $35. So you should probably check both Newegg and Amazon.com.
You will also need some thermal grease. Everyone that I know of who has ever built their own PC recommends Arctic Silver 5 Thermal Compound and NewEgg has conveniently placed it near the bottom on the screen as one of the "Essentials".

Normally I skip by all of these up-sell items, but this one you do really need. Just check the box and click "Add item with Selected" which will add both the processor and the thermal grease to your cart.
Installation Instructions
Before you begin, do yourself a favor and run out and get a #00 Phillips head screwdriver. I paid $2.49
for this one at my local hardware store.
- In my article "Upgrade the Memory in your HP EX470 or EX475", I've already explained how to disassemble the HP EX470 so I won't waste column inches here. First, follow steps 1-14 of that article to remove the motherboard and the memory.
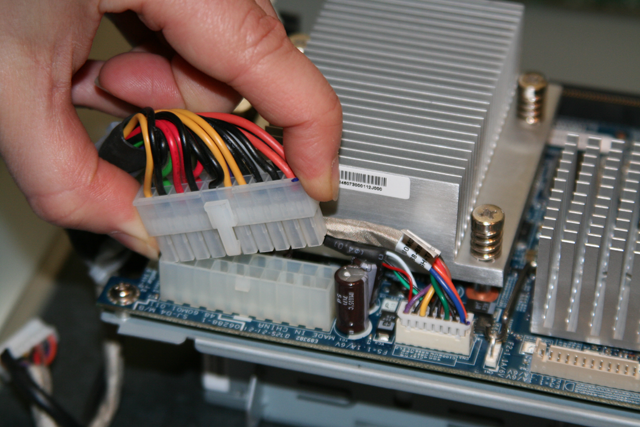
- With the motherboard removed and on a work surface, unplug the power supply (the large 20 pin connector) and bend it out of the way. This will help when we remove/replace the heat sink. Note: Click on this and any subsequent picture to enlarge.

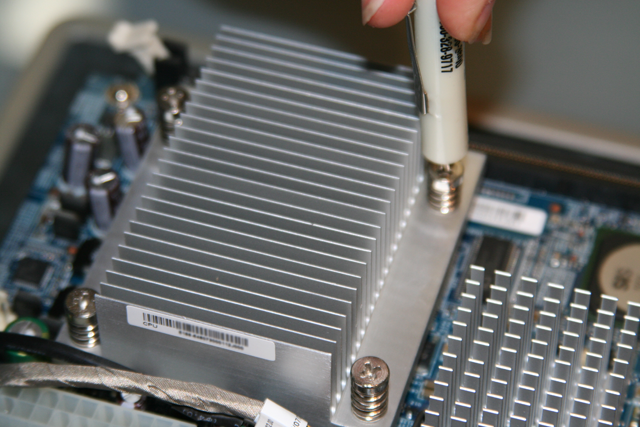
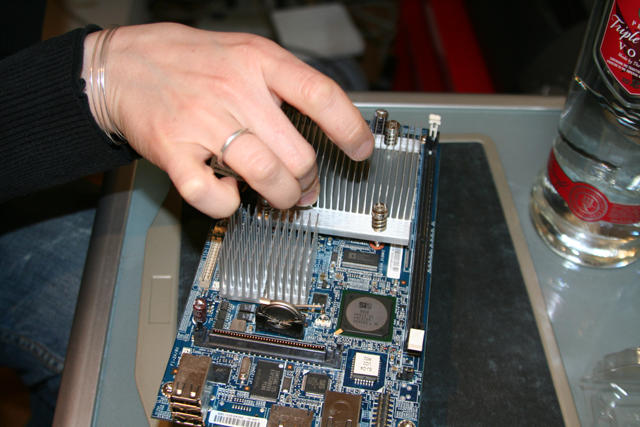
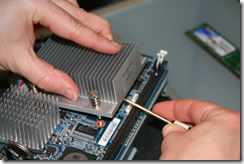
- Next we will need to remove the processor's heat sink. To do this, use a medium Phillips head screw driver to loosen the 4 spring loaded screws.
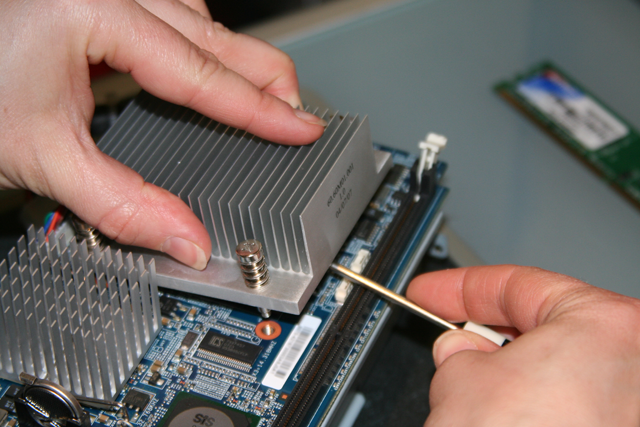
- Gently twist the heat sink back and forth a few times and then use a flat screwdriver to gently pry it upward. Be careful not to damage the motherboard, memory socket or the heat sink. The heat sink is bonded to the processor with thermal paste (which acts like, well, paste) so a little resistance can be expected.
- Now is a good time to thoroughly clean off the old thermal paste as we will be reusing the heat sink. It is recommended that you use isopropyl alcohol, but as I was fresh out, I settled for Vodka.


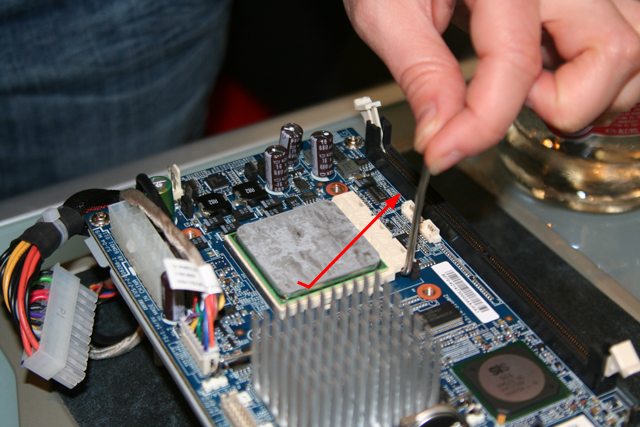
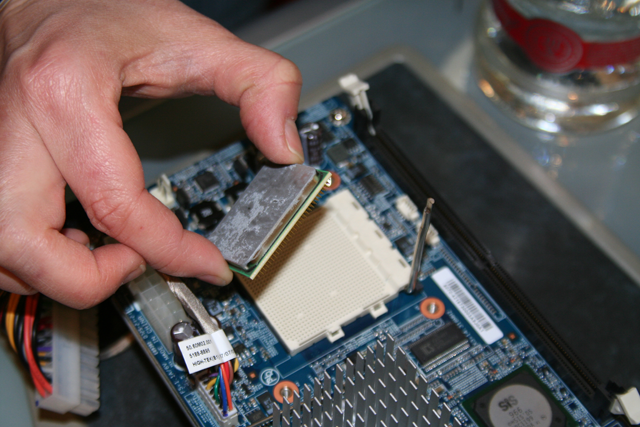
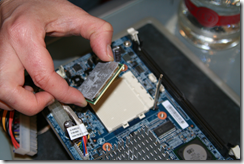
- Now lets remove the processor. Move the silver lever that locks in the processor, by pulling it outward, to clear the incredibly small white plastic tab holding it down, and then up. Move the lever until it snaps into place, so that it is perpendicular to the motherboard.

- You should now be able to easily remove the processor. Beware that the pins bend very easily, so you should lift straight out of the holes. Assuming that you will be saving this old processor, handle with care and set aside.
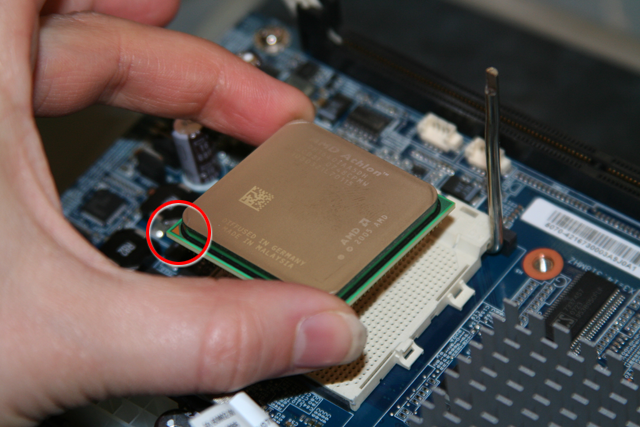
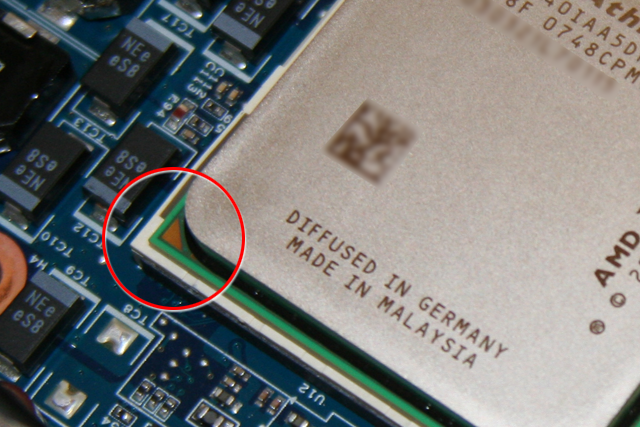
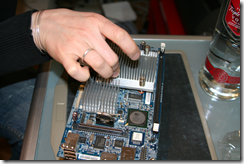
- Carefully open the new box containing our new processor. Again, as with removing the old processor, beware that the pins bend very easily if you are not careful. Before you even bring the processor near the socket, orient it correctly so that you can just pick it up and drop it in. The less handling time with this little brain, the better. How do you orient it? Note the key indication (a small triangle) on both the socket and processor. The triangle on the socket is faintly embossed on the white plastic, in the lower left hand corner (so faint it evades photography) while the triangle on the processor is copper (see photo). Pick up the processor (by the green corners or sides) so that it's triangle is in the lower left hand corner and now you may bring it to the socket, lining up the pins with the holes. Again, be nice to those pins. It should just drop in. Do not push, jam, force or otherwise cajole it. If it doesn't fall in, gently realign until it does.


- Lower the lever on the socket to lock the processor in place.
- This might be a good time to place the old processor in the new processor's packaging and put it away in case you ever need it again (like if you ever need to return the EX470 to HP for servicing).
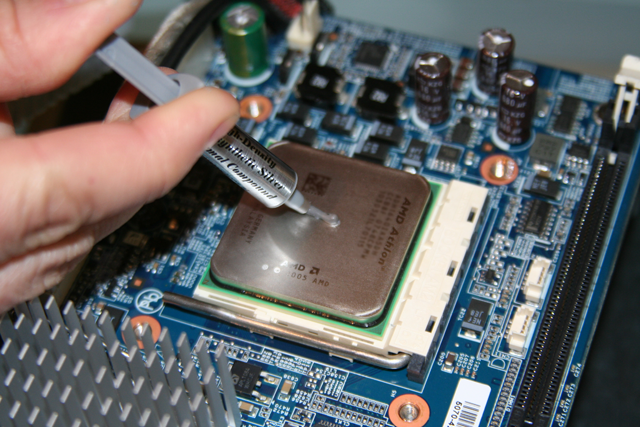
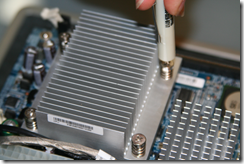
- Apply a small drop of Arctic Silver 5 Thermal Compound to the new processor (about the size of 1 and 1/2 grains of rice). A good tutorial on best practices can be read here. As Arctic Silver recommends: "less is more".

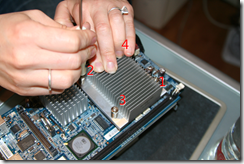
- Place the heat sink back on the new processor. It should only fit on one way, but the trick here is to look for the serial number. It should be facing you. A printed manufacturer's date should face away from you (at least that's how mine is).
- Tighten the screws in this order: 1 upper-left, 2 lower-right, 3 upper-right, 4 lower-left (i.e. you are making an "X" pattern). Hold the heat sink down with your other hand firmly, so that it really stays put as you as you tighten the screws. But not so forcefully that you crush anything, big guy.
- Reattach the power supply connector that we removed in step 2 above.
- Reassemble the computer, reversing steps 14 - 1 from the "Upgrade the Memory in your HP EX470 or EX475" article.
- Power up the EX470 and you are back in business.
- Use the Vodka from step 5 above and pour yourself a celebration shot!
Oh, if you are just noticing that we didn't use the heat sink and fan that come with the processor, you didn't miss anything. Throw it away, recycle it, paint a face on it and play chess with it, but you don't need it here.
Before and After
Here is a series of before and after snapshots of tests of the system, showing that vital statistics (e.g. system temperature) stay basically the same while we gain roughly 40% in raw system performance over various parameters.
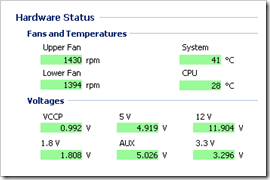
Hardware Status
Here is a look at my hardware status BEFORE the processor upgrade (left) and after (right). You get to this by going to the Hardware Status panel of the Windows Home Server Settings dialog. I have all 4 drive bays loaded with 500 and 750 GB drives and the system was idle and not balancing storage. At first the CPU (and thus the system) ran 3-4 degrees hotter than before. The next morning I was happy to see that it had settled down such that the CPU is now running the same (or 1 degree cooler) and the system temperature is actually 3 degrees cooler.

Resources
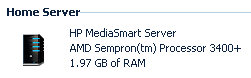
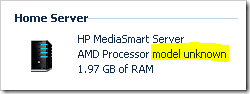
On the Resource panel of the Windows Home Server Settings dialog it shows the processor and amount of memory installed. The operating system can not determine the model name of the new processor for some reason, and is reported as "model unknown". This is normal and the likely cause is the BIOS.

CPU-Z Results
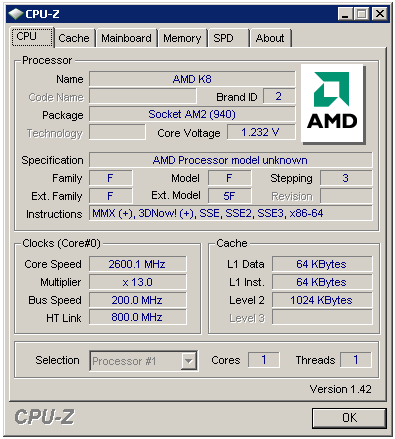
Here are the results from running CPU-Z both before and after (click to enlarge):
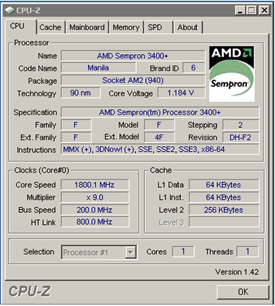

Both of these screen shots were taken when the processor was active, when idle the core speed would show 1000 and 1800 MHz respectively. This is because AMD CPUs have Cool'n'Quiet Technology which reduces the core speed during periods of low CPU utilization.
Again we see that the new processor is reported as "unknown model".
CPU Test
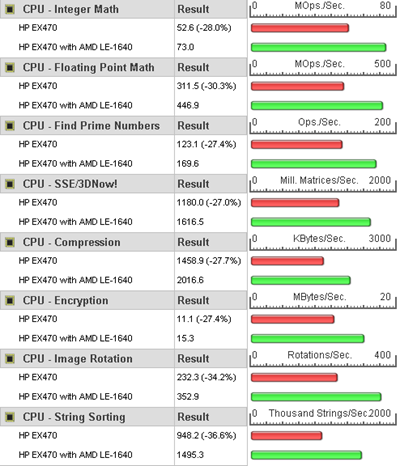
In the following test, I used PerformanceTest by Passmark Software to to evaluate the system performance before (graph in red) and after (shown in green) the processor upgrade. In this first set of tests, we measure the CPU performance. FYI, in the charts, a larger number is better, although I have no idea why the default report is a negative percent slower rather than a positive percent faster, but that is neither here nor there.
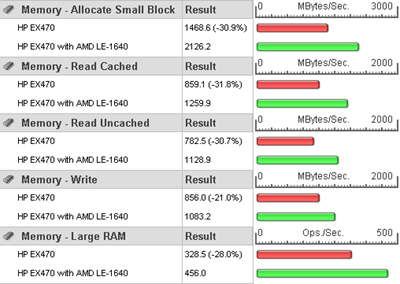
Memory Tests
In this next set of tests, we measure Memory access. Again, a larger "Result" number shows better performance.
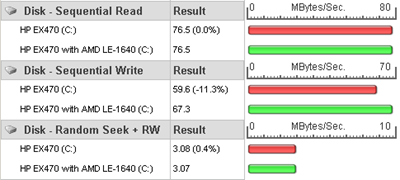
Disk Tests
In this last test, we measure disk read and write performance. Here I wouldn't expect such dramatic performance increases as we are dealing with the same hard drive.
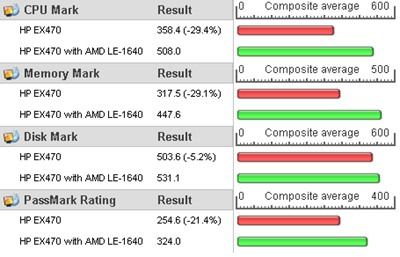
Overall Performance Marks
Overall, the new processor performed very well against it's 1.8 GHz predecessor. Making our $55 investment well worth the cost in my opinion.
I stand on the shoulders of giants
Sure I took the time to write out these instructions and did a little background digging and may have suggested that a processor upgrade should be possible in my article "Processor Upgrade for EX470", but I can't take all of the credit. I read over on the MSDN forums that someone by the name of rtsirois and a bunch of folks at mediasmartserver.net had first upgraded their EX470 with a processor that would work. Their work motivated me to turn it into a tutorial so congratulations and thanks for the find!
Will It Float?
Sure the new processor hold up under idle conditions, but how does it fare under full load stress test conditions? I put it to the test in my next article... "Heating Things Up".
 I love my HP EX470 MediaSmart Server. List priced at $599 (street price $569) for 512MB RAM and a 500GB hard drive, it's a great little machine at a great price. But I'm always searching for creative WHS platforms. After all, it's supposed to be a "home server" and thus no one wants a regular looking tower PC case sitting in their living room.
Shuttle KPC Barebone
Intel Celeron 430 1.8GHz
WD 500GB hard drive
Windows Home Server DVD
Kingston 512MB Memory
 Kingston 2GB USB Flash Drive
 WD 1 TB external drive
 SATA Data & Power combo cable
 Arctic Silver 5 Thermal Compound